
Hey photo lover.
Taking (and making) great personal pictures is very much an underrated talent in the 21st century. You need to adjust, filter, crop, saturate, tint, increase brightness, reduce exposure — and blur — to get the right mix that’ll leave you smiling, till the next picture comes around. If that isn’t talent, we don’t know what is.
Our biggest job at text2photo remains to help you make great pictures easy — as easy as hitting that shutter release button.
To get us started, we’ve come up with this comprehensive post that sets out to achieve two things.
To discuss why photo blurring is such a great picture design strategy AND chat about how to execute this awesome strategy in four simple steps using text2photo.
Why blur photos anyway?
Photo blurring is the artistic quality of the blur produced in “out-of-focus” parts of an image. In more simple terms, the blur effect artistically keeps a part of the picture in focus, while everything else fades out.
When you blur parts of a picture, the blurred parts become the background. This is great for dynamic images because it allows all the unwanted elements in your photograph to take the back seat — and look hazy too. For example, you could make your logo or text stand out while the rest of the image fades out.
By fading out the unnecessary, the Blur effect makes it super easy for the main parts of your picture to be visibly defined, like a tall strong oak tree surrounded by colourful weeds that are visible, but not intrusive. The less important details are thrown behind a hazed wall so that the overall expressive feel of your photo is easy for the audience to spot.
Text2photo, through advanced (yet simple) technology, has the tools you need to create awesome photo designs through photo blurring.
Keep the noise out and enhance your text or logo by blurring them with these four simple steps using text2photo.
FOUR SIMPLE STEPS
Upload your photo to text2photo’s online photo editor
This step is as easy as steps get.
Hit the “Select Image” button on the home page and get your picture uploaded within five seconds.
You’ll immediately see a text box appear on the uploaded image. If you don’t need it, hit the “X” button located on the edge of the text box.

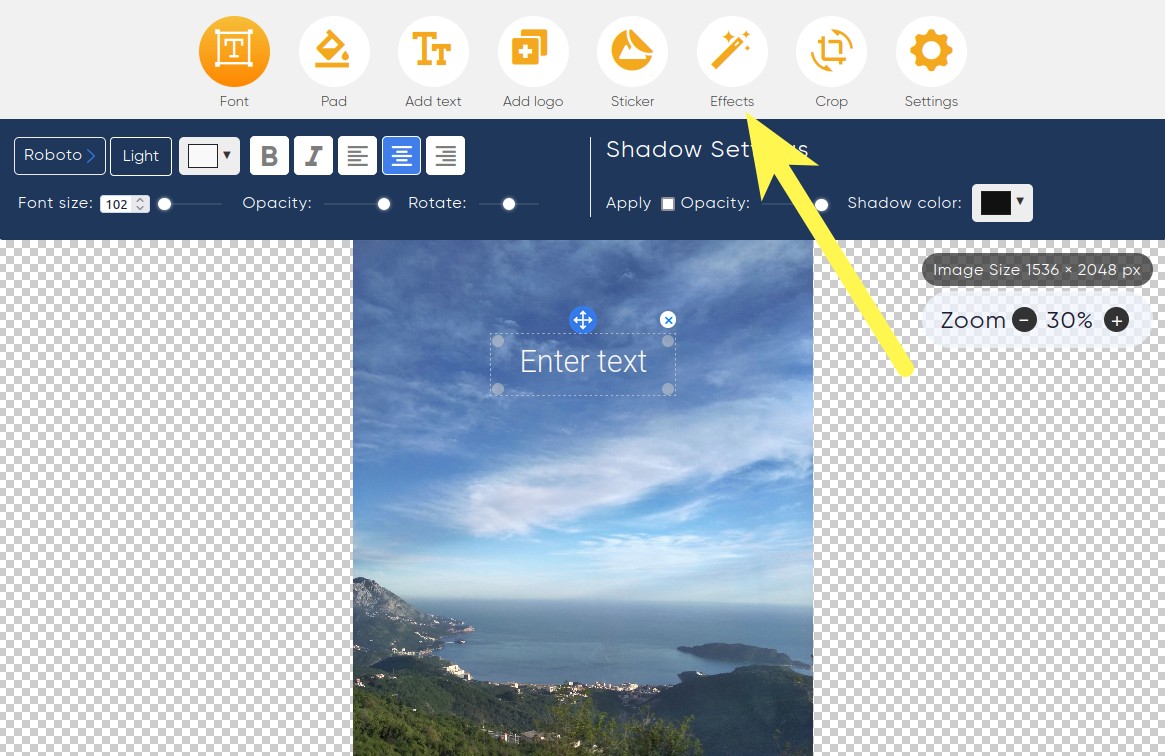
Look for the “Effects” logo. Then, click it!
The “Effects” icon is located at the top of the online editor in a classy group of yellow icons.
This should open up a set of options that should mean pure delight for any artist. You should now be looking at a set of tools that can help you manipulate your picture in several ways.
Find the “Blur” slider
Use the slider to blur your image in any way you want.
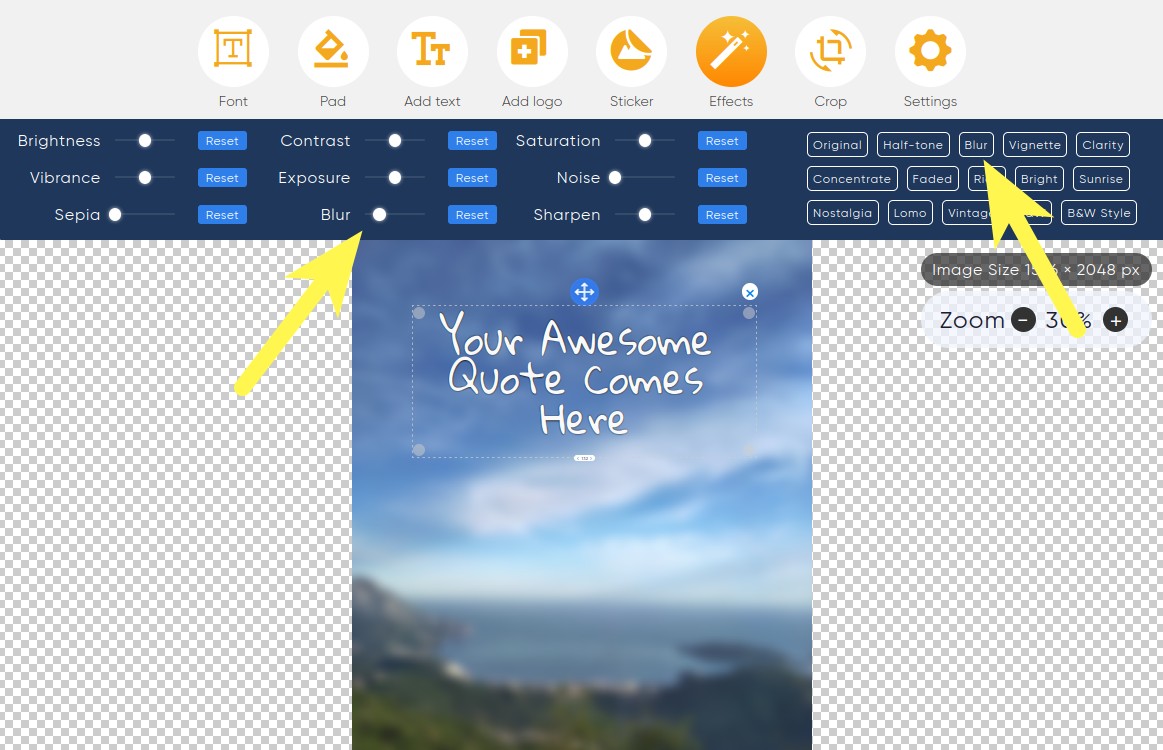
Here’s some additional information for you. At the right-hand side of your screen, there’s a list of preset effects for you.
You can pick out any of those effects and try them on.
You can blur your images even faster by using its preset option.
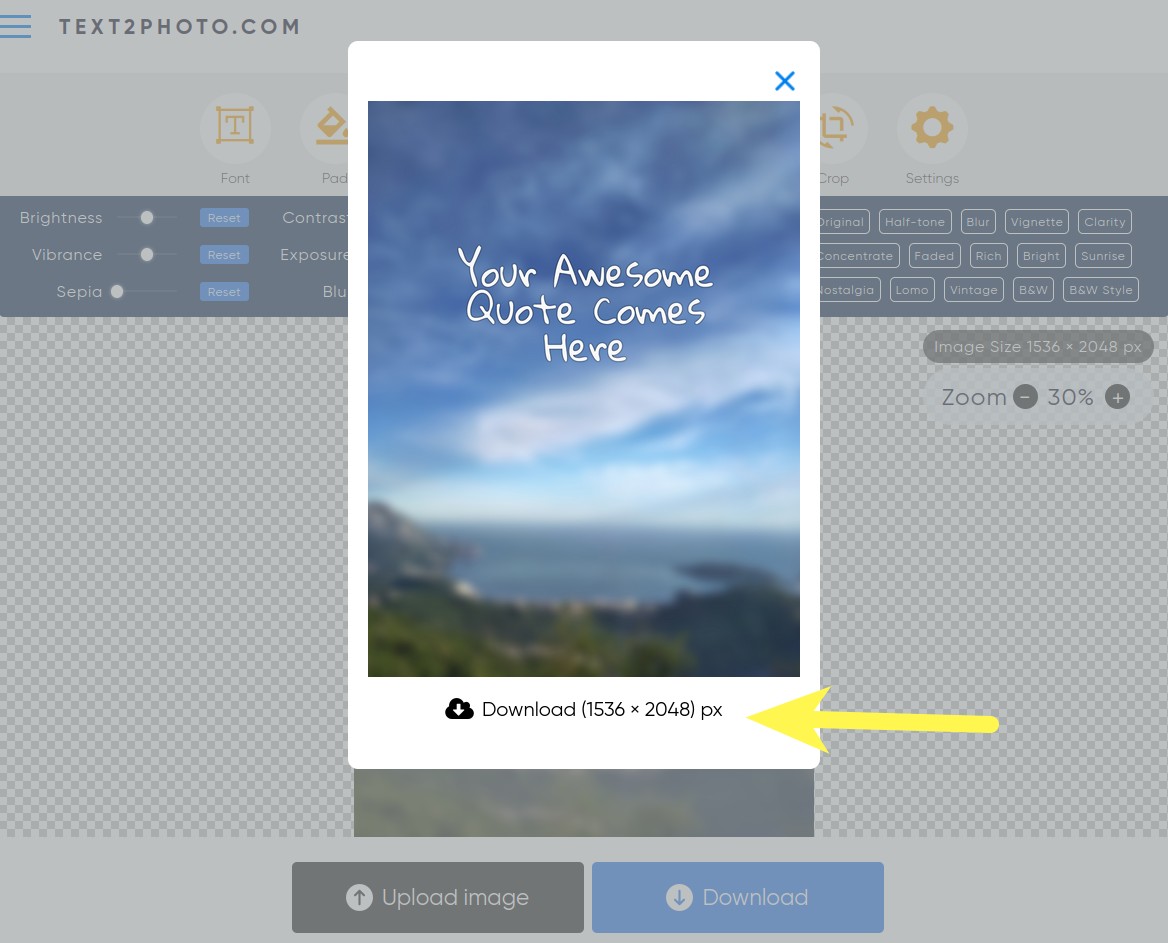
Download your awesome image
The “download” button is that bold blue button at the bottom of your screen.
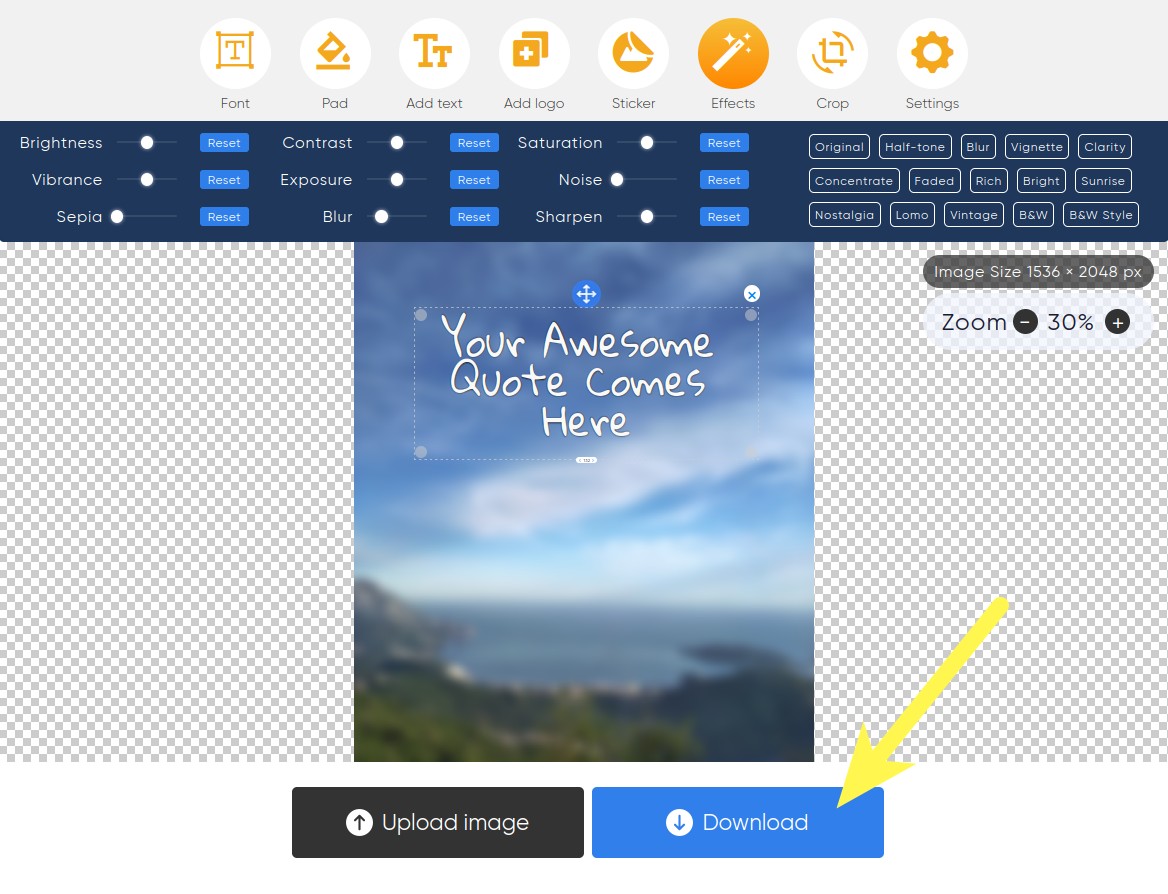
Now, you have what you came for — an image that speaks your imagination.
PS. There’s more to blurring. Our designers at text2photo are currently working on advanced technology that can help you use the Bokeh effect (another photo blurring technique) to blur out only selected parts of an image.
There’s more value to come — for free!
Hit here to try out your photo blurring skills.